Wednesday, 10 February 2016

Walking with a Camera - the shift to a mirrorless camera and other gear


The Sun rises over Kanchenjunga
illuminating each peak in an
awe inspiring light show
Mirror, mirror on the wall...... mirror or mirrorless?  An increasingly relevant question as mirrorless cameras (MLC) or interchangeable lens cameras (ILC) are getting technically closer to their bigger sibling the DSLR.  This is not a technical treatise as technology in cameras (all things electronics actually) is often outdated by the time the article is typed. However the proof of the pudding is in the eating and articles on the net show more and more photographers switching to high end MLC from DSLRs, why this shift?
A flash of bangles in a street in Hyderabad
notice the sharp focus and gentle bokeh


This is my description of a chance encounter with an MLC at the Dubai Duty Free leading to my going the mirrorless route in cameras. As usual when I have time to spare, I saunter around the camera shops, and at the DDF, an energetic salesman very persuasively pushed me in the direction of an older model of MLC, (the Fujifilm X-E1, an excellent camera which I still own). It was on sale  at half price with two lens, spare battery and SD card. Not convinced by his spiel, I quickly found a wifi signal and researched the concept.  I had not researched the topic deeply enough to be convinced however, I decided to chance it as the price was very attractive. So I landed up with my first MLC. I have never gone back to a DSLR, as this camera meets all my expectations in image quality. At that time I was using an excellent DSLR which I kept it for a while and found that I barely used it so I sold it.See some of the images I have shot with the mirrorless Fujifilm X-E1 camera here:  


 https://www.flickr.com/photos/129459215@N08/albums


An MLC is unobtrusive and so great for street photography
My initial kit was the Fujifilm X-E1 with two lens, a 18-55mm and 50-230mm. Since then I have upgraded to the Fujifilm X-T10 and four lens, the original two and two more, both primes, one a 35mm and the second a 60mm macro. This system covers all my needs and would yours too, except for extreme range wildlife/bird or sports photography as the lens is currently not long enough, (possibly already available by the time I write this).
A shikra takes flight.
In daylight the MLC can get very fast action


So, how is the MLC different to the DSLR? Currently the DSLR has more software and features than an MLC, notably in a full-frame DSLR. However few of us use a full frame DSLR, and an MLC  compares almost evenly with crop frame DSLRs. The essential difference being that a DSLR uses a mirror to show the image in the view finder whereas the MLC uses either an LED screen or a electronic view finder, (EVF), the Fuji it has both. The mirror and EVF each has its advantages, however I have gotten used to the EVF as it shows the image as it will record on the sensor, as opposed to a mirror which shows an image as you see it, not as it will be recorded. There is substantial debate on the net on the merits of each system, read it to understand what will suit you.


I use my camera on the move, often trekking up mountains and so weight and size are of vital importance to me. Here MLCs outgun their sibling DSLRs by a huge margin, the camera I use, a Fujifilm X-T10 with a 35mm (50mm in full frame format) lens is about a kilogram lighter and half the size compared to my earlier DSLR with an equivalent lens. Given that my DSLR was also crop frame (APS-C) and that the results of my Fuji are equal to if not better than the DSLR, the shift was a no brainier.


A spot-billed pelican takes flight
To keep my camera system weight in control ( a lesser problem than keeping my own weight down!)  I follow a strict philosophy of carrying a lens for the anticipated main subject fitted on my camera, no more. The disadvantages of constantly changing lens in the field results in more lost opportunities than any other factor. Not to mention the ingress of dust and moisture into the body and lens. Hence for short trails I carry two cameras, each with a lens fitted. But when I recently trekked to the Valley of Flowers, five days walking in the Himalayas, I carried my Fuji with only a 18-55mm lens fitted. No long lens, no "what if...." I got beautiful photographs and must have missed the long lens for only four or five pictures.  You may see my Valley of Flowers pictures here: https://www.flickr.com/photos/129459215@N08/albums/72157657142242599 and the Flora of Hemkund here: https://www.flickr.com/photos/129459215@N08/albums/72157657562803801  
Brahma Kamal at Hemkund
carrying a camera to 4400 metres
requires a light camera or a lot of strength
 When trekking, specially climbing, every gram seems a kilo. Avoid carrying every bit of photographic gear you own "just in case....".

So happy was I with the results of my earlier Fuji that somewhere along the way I bought a pre-owned 60mm macro, my first prime and there was no looking back, primes it was. My newest baby is the 35mm f1.4 prime, it delivers the most delightfully sharp pictures. In fact for travelling, one camera body, a 35mm prime and and a long lens seems to me to be an optimum combination. The 35mm is perfect for landscapes, people and general photography while the long lens allows pictures of birds and wild life.


One other piece of gear that I find indispensible is a tripod. It enables me to take really sharp pictures of anything but fast moving wildlife or birds and sports.  If you use one of those extreme long lens you simply must use a tripod or gimbal. Further don't make the mistake that I, or most other cameras owners make.  Seeing it to be unimportant gear, I  initially bought a cheap one, realising my mistake, I  incrementally upgraded, finally spending much more money to get as good tripod. Just buy the best you can afford, give it the same
The sharp focus, details and soft background
of ants scurrying about a flower
importance as the camera or lens. I use a MeFoto trekking tripod with a ball head, lightweight, easy to operate but firm. Light weight is important, ask a camera wielding friend I met on a hot day in Bharatpur. He had camera gear that was worth about a years salary,  including a lens as long as my arm, so I asked him as to why wasn't he using a tripod to get the best results his system was capable of? Sweating in the sweltering heat, he replied that it was in the car, too heavy to carry! As my granny said, textbooks under your pillow don't enable you to pass the exam; so it is with tripods in the car, they can't be used.


Another seemingly lowly equipment takes on great importance on a long trek or walk, the camera strap. A heavy camera slung around my neck all day is a sure way to end up with a stiff neck. I feel it is easier to carry the weight on a shoulder, and I use one of two ways to do so. After trying various straps,  I have designed my own, this attaches to two points ( the strap rings on the side) on the camera as opposed to one point (the tripod screw). I feel that two points is more secure than than just the tripod screw, also held at two points the camera does not swing as much, besides this method leaves the tripod screw free to attach a tripod plate. Besides I have designed my strap in a manner that it can be used around the neck, over the shoulder or as a wrist strap.


A symphony in steel
The second device that I find very useful to carry a camera is a camera clip, I use the older version of the Peak Diamond. This clip has two parts, one part is an Arca Swiss type plate which screws onto the tripod screw of the camera (and can be very conveniently used to mount the camera on a tripod); and the second is a holder which clamps on to the shoulder pack of a backpack. This arrangement holds the camera very firm while walking, yet allows quick deployment. Though I suspect that this arrangement will not be suitable for a DSLR as the weight may dig in.

Bespoke camera bags carry little else and when I am out for many days I need space in the backpack for other stuff. Hence I seldom carry a camera backpack or camera bag, using a soft Neoprene cover with which I cover my camera and put it in my trekking rucksack. Another small (airline toilet) pouch carries spare batteries, SD cards and a polariser. When I feel I may not get charging facilities, I carry two spare batteries in addition to my fully charged one in the camera. I have made it a habit to charge my camera batteries whenever I can, I never venture out with a partially drained battery.
A glorisa lily shows the range of colours


When trekking, especially in the mountains, expect unexpected rain. There are two ways I protect my gear, a zip-loc bag with tiny holes serves me well to cover my camera in light rain, keeping it ready for immediate deployment. In a downpour I put my camera into my backpack which is water resistant. In either case, I always carry a poncho as opposed to a raincoat, a poncho is far more versatile as it covers me as well as my rucksack and other equipment. Besides a poncho is far more ventilated in the hot and humid walks around Bombay.


I give my gear serious thought before a trek, primarily carrying only that equipment I need for my primary subject, making sure I am comfortable and my gear protected. Very seldom have I missed any equipment or opportunity for lack of some lens that I wasn't carrying.

Monday, 25 January 2016

Tadiandamol - a photojourney through the Sholas of Kodagu

The first view of Tadianamol Peak
from the walking path
Tadiandamol?  Now where is that? It is only when I was atop this beautiful peak did the beauty of the Kodagu hills strike me. The highest peak in Kodagu (erstwhile Coorg), Tadiandamol stands proud in a cluster of hills near Virajpet.  It is not much of a climb, about two and a half hours from the road head, but the views around are breath-taking.

Marsh Crocodile
all eight feet him him
My lightning trip weekend trip started in Bangalore the day prior, three photographer friends and I started by car at about 7 am, by mid-morning we were in Ranganthittu Bird Sanctuary. 

A bird photographer’s delight as the birds are close and the morning sun is behind one, beautifully illuminating the birds. It is wonderful to see many nesting birds including Open-billed stork, painted stork, herons and the ubiquitious spot-billed pelican. The many marsh crocodiles we saw were huge, 8 to 10 feet by my estimation, and the jaws are quite intimidating. 

The intimidating jaws of a
 Marsh Crocodile
The pelican is an entertainer, fishing on the fly, its flight looks lazy and slow, till you try to photograph it. I found many blank frames in my sequence of photographs, it is fast, very fast.  I suppose here, rather than the early bird getting the worm, the swift pelican gets the fish.

A Pelican lines up for the swift attack

A  a swift flurry of water

BANG he has got it
A conclave of storks... Painted and Open-billed

Namdroling monastery

At 
another view of Namdroling Monastery
The sanctum sanctorum of the monastery
colourful beaded bracelets being sold outside the monastery

At Bylakuppe village we had noodles for lunch in one of the many Tibetan restaurants along the road. This is the location of the Namdroling Nyingmapa Monastery, a major learning centre for this branch of Buddhism, replete with the Golden Temple, the university and library.  Relatively recently established in 1962, the workmanship is ornate and exquisite.  As with all the monasteries I have seen, the work is colourful, detailed and in various media like metal, wood and cloth and stone; a tribute to the deep dedication of the craftsmen. At Madikeri we walked up to Sultan's Seat, a garden from where to see the sunset. Being a weekend there were huge crowds all there to enjoy the solitude of nature in each other's company! Selfies and all. The sunset that day was unremarkable and we took a few photos merely because we were there.


Next morning we left our hotel at 5.30 am but reached the start of our climb at about 9 am, after a breakfast of parathas and a local watery sambhar at a plantation worker's house. Every house in the plantations is very proud of their flowers and at this house there were bright and cheerful yellow flowers. Along the way we drove through vast coffee plantations, the bright red coffee berry was ripening on the plant and at many places the berries had been laid out in the sun to dry. 


Bright yellows at  the hut
where we had breakfast

more yellows

coffee beans ripening on a tree


We drove a little further to the roadhead, and found a very pretty homestay at the end of the road, West Wind Cottage, their rates were quite modest and I would recommend that anyone wishing to go up Tadiandamol should spend the night there, it enables a very early start. During our walk we found many tented camps by the path, people had spent the night here so as to get to the top to see the sunrise. 


The trek to the peak is very scenic, passing mainly through grasslands interspersed with sholas.  Sholas are stands of stunted tropical forest found in valleys amid rolling grassland in the higher regions of Kodagu and other South India highlands.  The strip of dense vegetation appears to follow the watercourse in the valley coming off a mountain. The last stretch is steep and suddenly I am on top, rewarded by a majestic panorama of ridges and hills around.  The serenity of the Kodagu hills is truly spiritual.


an unusual cloud over Tadiandamol

early morning inversion over the hills

View of the hills with grasslands interspersed with Sholas


One of the ridges emanating from Tadiandamol

A panorama of the hills around

Friday, 20 November 2015

The Trekking Photographer


The Spectacular beauty of the mountains

Every muscle is straining after six hours of ascent, at 3700 metres my oxygen deprived lungs are gasping, adjusting the seemingly heavy load on my aching back (where did all that extra weight come from?), in a final burst of energy I climb the final slope and in a sudden breath-taking moment a spectacular panorama unfolds, verdant mountains, veiled in clouds surround an icy lake with flowers in profusion.  Suddenly months of preparation and the cost of the trip become worth it. After I have absorbed the beauty of what I see, I reach for my camera to record for posterity what the eye and mind sees. This is exactly what I experienced when I trekked to the Valley of Flowers in Northern India earlier this year. 


See my earlier blog on the Valley of Flowers on this site and my site on Flickr for photographs for this slice of Gods own corner. Links below:

 http://xerxespa.blogspot.in/2015/08/valley-of-flowers-and-hemkund-trek-to_30.html

https://www.flickr.com/photos/129459215@N08/albums/72157657142242599 for VoF pictures and 
https://www.flickr.com/photos/129459215@N08/albums/72157657562803801 for the beauty of high altitude flora at Hemkund above 4000 metres. Including pictures of the famed Brahma Kamal.


The famed Brahma Kamal at an
altitude of about 4400 metres

For the entire seven day trek to the Valley of Flowers I had decided that my primary subject would be flowers and landscape, so I carried a versatile 18-55 mm zoom with my  Fuji XE-1 mirrorless camera and a tripod; keeping it simple I carried no other photography gear. I even left behind my Circular Polaroid filter (CPL), a fact that I regretted as the UV was very sharp at this unpolluted altitude.


the intriguing Bellwort

Most trekkers I saw and continue to see on my peregrinations carry inappropriate equipment or are unprepared for these golden moments, hence bring back mediocre snapshots taken with kilos of expensive equipment carried laboriously to the top of the mountain. A little forethought and preparation will enable you to get superb pictures of your treks and travels.


What to carry

Subject.  When you plan your trip, research and decide what will be your main subject 
during the trip.  All your equipment must be focussed (pun intended) towards this, camera, lens, flash and tripod. Do not “what if….” every scenario, or you will end up carrying the kitchen sink!    I had no long lens, no flash and I never missed them. I have too often seen very enthusiastic but ignorant "photographers" lug huge and heavy equipment (bazooka sized telephoto lens for example), lens wholly ill-suited for the subject contemplated.  Their ardour  literally crushed by the weight of their equipment. Carrying less weight is very very important, I cannot this emphasise enough. When trekking every tiny item quickly begins to weigh a lot and what should be pleasure soon turns into a very unpleasant experience.


Hemkund Sarovar

Camera. The camera is your digital eye and select it carefully well before your trip. Remember that a couple of hours into a climb, every gram is going to seem like kilos, weighing heavily on your shoulders. Hence it is vital to carry as light a camera as possible. Choose between a DSLR or mirrorless (MLC) system (assuming you are an advanced amateur), each has its advantages and disadvantages, but a MLC is generally substantially lighter for similar sensor size as most mid-range DSLRs. Prosumers and point and shoot cameras too have their place depending on what you own, can afford, your capability and your potential subject. 

The outdoors is rough, dirty, wet and dusty, all serious enemies of the camera and lens you carry, hence expose your expensive equipment as little as possible.  Avoid changing lens as an open camera in such an environment can be seriously damaged.  Besides, fiddling with lens at critical a time means you could miss action or fleeting moments. Therefore I recommend the options are to carry:

  1. ·       A prime lens of an optimal focal length for the type of pictures you intend to take. For landscapes and general photography a 35mm to 50mm is suitable.
  2. ·       A zoom that covers the possible range you might want, (this is what I did, 18-55mm zoom covered all my needs).
  3. ·       Two camera bodies with different lens, (watch your back and shoulders).

A jewel in the flower

Tripod.  There is little point in investing in expensive equipment, lugging it around and coming back with mediocre unsharp pictures. For truly tack sharp pics a tripod is vital. Today there are wonderfully light and compact tripods to suit every pocket and need. Get one. heavier tripods are more stable and light ones easier to carry so it is a trade off.  Remember, the heavier your camera the sturdier (heavier) tripod you will need. And don't forget that remote release. Other than when photographing fast moving birds, I almost always use a tripod.
Minimum accessories. As I said earlier, every gram will seem a kilo when it's on your back or around your neck, I have more often than not seen photographers carry everything they own, camera, lens and flash. Recently when on a moderate trek, I asked a well-equipped photographer as to why wasn’t he using a tripod with his lovely long lens, he replied that as it was too heavy it was in the car and he would get it if required! Of course neither of us mentioned that his car was a four hour climb away. It is important to visualize the subjects that one is going to photograph and carry appropriate equipment for that only.  This applies to all the gear, flash, lens, tripod included. Minimum gear also inculcates a discipline and creativity in doing the most with minimum gear. On the other hand remember that most outdoor locations have limited charging facilities so always carry spare batteries and memory cards. I generally carry one extra memory card and two  fully charged batteries as spare.
notice my camera rigidly attached to my rucksack strap

Carry Rig.  Do not for a moment forget that you will be walking for hours if not days with your equipment.  The neck strap that came with the camera is generally not good enough for this and leaves the camera swinging and your neck aching. Besides a swinging weight around your neck in rough terrain inhibits movement, leaves you susceptible to injury and your camera to damage. Some intrepid photographers carry bespoke backpacks and pack in everything photographic they can, leaving little or no room for the other necessities for a trek. There are many types of bags, backpacks, straps and harnesses in the market, choose one that’s good for you. Important points to note are that the equipment should be firmly secured, the load distributed on shoulders and/or hips (not on the neck as most camera straps facilitate), and easily accessible.  I had my camera in front, clipped to my backpack strap using a Peak Diamond clip. The same Arca-type plate works for this bracket and the tripod.
Weatherproof cover: The weather in the mountains or on a trail can change rapidly, always carry weatherproof covers for your camera and equipment. Carry it even if the weather says no rain. If you have to, carry a shelter to change lens if it is raining.  An umbrella or poncho is better than a rain-jacket for this.

My friend Aarish stocks varied equipment for trekking and carrying equipment and Basav is an expert in equipment and fitness, they have advice for equipment for every level of fitness and type of camera. They would be happy to help and can be contacted below:
aarishsingh@gmail.com
basavm@gmail.com


What to do

Read the manual and practice. Too many people buy new cameras days before the trek of a lifetime and spend the whole trip figuring out the controls, an expensive lesson indeed. If you don’t want every alternate picture blurred or blank, be smart, read the manual and practice, practice till you can handle most common settings without removing the camera from your eye. Find a similar subject and practice angles, exposure and themes.

Knowledge of the location: Research your intended location from the photography point of view. Know exact times of sunrise and sunset, the morning and evening golden hour in the mountains are spectacular.  Know where the photo ops are. Be realistic in your trek timings, factor in the time required to take pictures on the way.

Be fit: Be fully aware of the physical demands of where you intend going and the load you intend carrying.  If possible practise a couple of times near your home and see if you are comfortable. For gear on trekking see my blog The Fashionate Trekker at the link below:
http://xerxespa.blogspot.in/2015/08/the-fashionate-trekker.html

Patience is a virtue and make the journey as much fun as the destination, stop to take pictures, smell the roses and enjoy your trek. Bring back photographs that were a joy to take and more important a joy for others to see.


Majestic Mount Rataban, briefly parting her veil of clouds,
seen through the length of the Valley


Sunday, 30 August 2015

Valley of Flowers and Hemkund -a Trek to Paradise

The Valley of Flowers
  
Climbing the last kilometer is strenuous, I sweat despite the mild cold, the thin drizzle permeates my clothing with dampness and the wet mud is slippery.  As I round a bend in the mountain side rapt in my misery, almost theatrically a wide vista unfolds showing a wide lush green valley with patches of colour and Mount Rataban proudly at its head.  It is magical, the tiredness of the climb falls away and the spellbinding view makes the arduous climb of two hours so very worthwhile. 


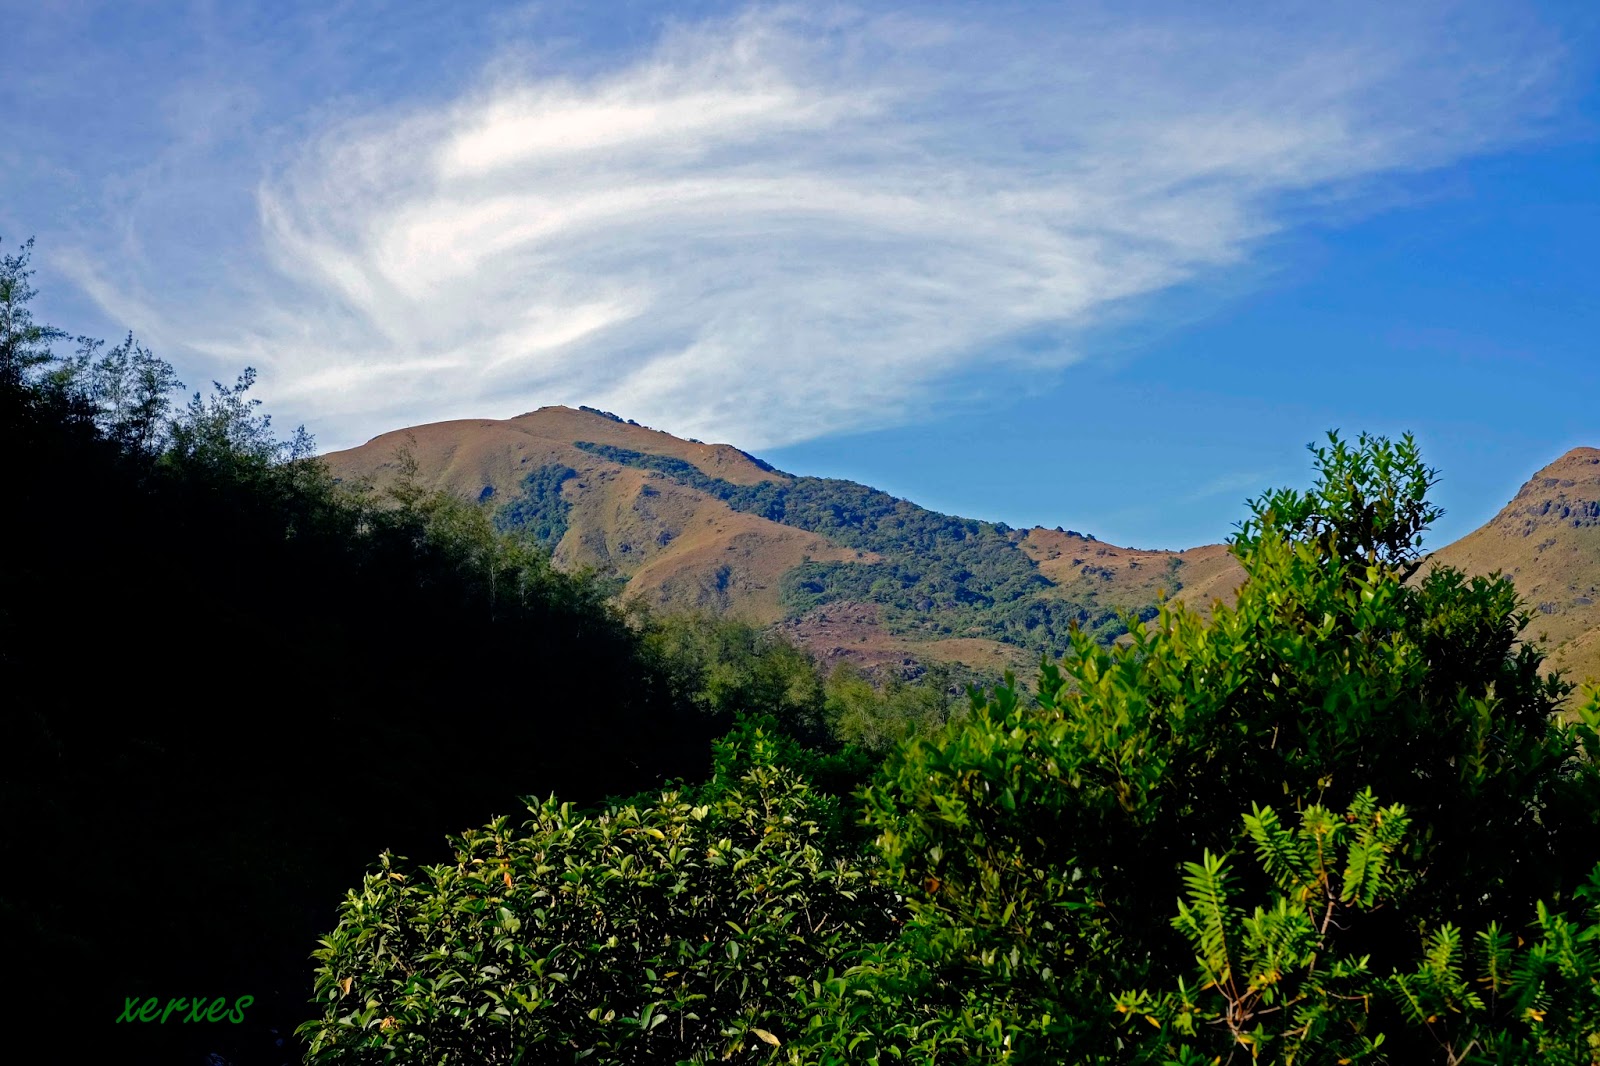
Angelica with cloud veiled mountains in the background

My trek to the Valley of Flowers (VoF) has been a dream for many years, a dream that I was determined to turn to reality for a week in August 2015.  There are many travelogues of ‘how to and where to’ on a trek to VoF so it is not my intention to replicate these. I will put together a kaleidoscope of thoughts and suggestions giving more of a flavor than a guide.
The trip started on Day One on a flight from Mumbai via Delhi to Dehradun and then a taxi to Rishikesh.  At Rishikesh I stayed at the Garhwal  Mandal Vikas Nigam (GMVN) guest house at Bharat Bhoomi, it is basic but neat, spacious and clean with very friendly staff. That evening I scoured the market for ways to get to Govindghat, I went to two taxi stands and a bus stand.  The taxi stands were misleading (and I suspect self servingly dishonest).  Quite by accident I discovered two important aspects, one that all visitors to Ghangaria were required to do a photo-registration at a booth near the bus stand, which I did.  The second was that there are direct taxis from near the Gurudwara at Rishikesh to Govindghat, I booked myself on one starting at 5 am next morning (Rs 500 a seat).  These are shared Tata Sumo with 10 passengers to a taxi which is a seriously tight squeeze, so I purchased an extra seat to make space for myself. 

On Day Two our taxi started at 5 am and it was a long, hot, dusty ride along rough roads with few halts, reaching Govindghat at 2.40 pm. Along the way passing through tiny towns which read like the index of a book by the redoubtable Jim Corbett who had shot some of his many man-eaters here,   Devprayag, Rudraprayag and Chamoli went by.  All along we followed the Alaknanda River till Govindghat.  This long taxi journey is perhaps the only tedious part of an otherwise lovely trip. A few kilometers short of Govindghat most network signals cease.

At Govindghat I cast around and found a nice hotel, Bhagat, and prepared for the trek next day. Repacking my day pack for trekking as opposed to travel by air and road, for a guideline of what I carry when I trek, please see my blog here:

Madan, my intrepid porter
 and I on the way up
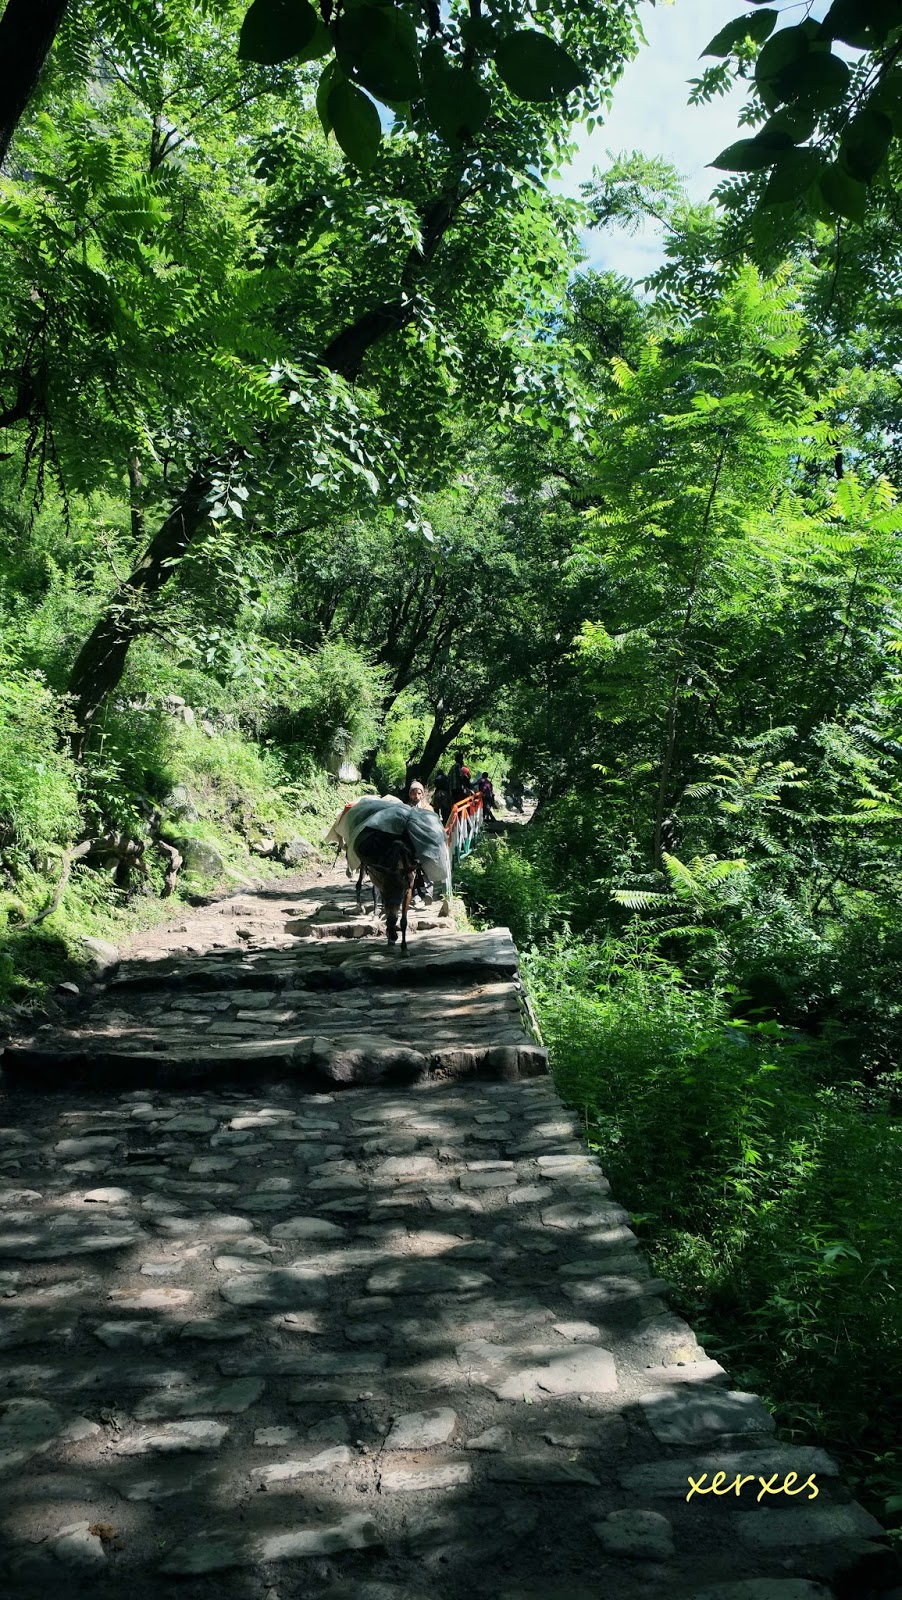
The track going from Govindghat
 to Ghangaria
Up early on Day Three, my hotel manager hired a porter for me (Rs 790), he would carry my large pack to Ghangaria.  The porter and I walked about 1.5 km down to a bridge on the Lakshman Ganga from where a taxi would take us four km to the start of the trek. I started trekking at 8.20 am along a broad stone path which is undulating in its initial stages till the river bed. Earlier floods had washed away many bridges so the path went across causeways and stony river beds.  Being the monsoon, there are beautiful waterfalls on the opposite hillside, including a mighty three stage fall of at least 2 to 300 metres .  The path is largely well defined, shady and the walk pleasant. 

The route has many dhabas and I enjoyed the stuffed paratha and lemon tea, the latter being a very refreshing drink while trekking. After crossing the river, the climb is nearly continuous for about two hours till Ghangaria. There are many people on the route, Sikh pilgrims and tourists giving the place a carnival air. I trekked about 12 km, climbing from about 1800 meters to 3100 meters, reaching at about 2.30 pm.
A la carte - the menu at a decrepit dhaba
At Ghangaria, again it was hotel hunting time and after much looking around I settled for the slightly ‘up market’ Nand Lokpal. It wasn’t exactly five star, but moderately clean and comfortable.  Ghangaria has a very short season of about four months and everything is brought up by mule or porter hence food, water and commodities are expensive, so carry up what you can or be prepared to buy it at the prevailing rates.  An NGO called EDC is doing sterling work in managing waste in that fragile environment, it is vital that we add our mite to keeping the waste under control.
another waterfall along the route

At 3100m one has entered high altitude and it is important to take sensible precautions in acclimatizing for trekking higher to VoF and Hemkund.  Remember that Acute Mountain Sickness (AMS) can kill you or ruin an otherwise lovely trip; on the other hand a few sensible precautions can mitigate the risk considerably.  Before starting, have a doctor check you thoroughly to ensure that you are fit enough to undertake such a trek. Then follow an exercise programme a few weeks prior to make sure you are moderately fit to walk and climb at high altitude (there are many programmes on the net).


I did not buy water; instead I used water sterlising tablets the evening before to prepare two litres of water for each day’s trek. I do this whenever I am outdoors as it ensures I don’t have to buy plastic bottled water and so reduce the garbage in ecologically fragile areas.


Panacea for sore muscles
at the end of each day
Day Four saw me make an early start; I was out by 6 am and after a brief climb reached the forestchowky by 6.30 am to buy my VoF pass, (Rs 150 for 3 days). It was a bright and sunny morning and so that day there were many visitors and the trail up was a carnival.  The climb was ardous, but rounding a final bend the panorama is more than a reward for the ardour of the preceding two hours. I was at Shepherd’s Rock, a landmark in VoF, by 8.45 am and ate my packed breakfast (greasy sabzi- puri).  


Here I saw a jarring sign of the “great Indian tourist", the forest department had diverted  a mountain stream so that trekkers could fill water bottles. Right next to this someone had left a big, bright blue bar of washing soap, slowly dissolving into the pristine stream. A little further on I saw the shine of silver foil discarded after someone’s breakfast, lying among the flowers. I also met the guide/owner of a very large agency specializing in VoF; he boasted of his 400 GB of photos and his undying love of the Valley, all the while playing loud music on his phone!  We are somehow hell-bent on destroying our environmental heritage.


A list of some of the flowers
 to be seen at VoF

The VoF is truly spectacular, cloud veiled mountains stand sentinel around a green and lush valley through which the Pushpavati River flows, this valley in turn is dissected laterally by glacier fed mountain streams; all making for an idyllic scene. There is a stony path made by the forest department which meanders through the vegetation and one gets to see the flowers along this path. One path goes on to Joan Margaret Legge’s Memorial; she was an early pioneer into the Valley and the other path to the end of the Valley.


Joan Margaret Legge's Memorial

The flowers are spectacular, but I am no authority on flora and much has been written about the flowers in VoF, so I shall not dare tread there.  The common plants I saw were Balsam, Angelica, Bladderwort and Large Bellflower among stands of other beautiful flowers.  For my pictures please see these links to Flickr:

As is normally the pattern in the mountains, the weather rolled in at about 12.30 pm, clouds roiled up the Valley, wreathing the mountain slopes in white.  Shortly it began to rain, almost signaling me to begin my return journey which took about two hours in very slippery slush. I was back in Ghangaria by 4 pm.


Glacier and stream emanating from it in Vof

Ghangaria is a small town, and most mobile call services do not work here, there is no data service at all, so forget Whatsapp and e-mail. STD booths (I had almost forgotten these!) abound and I got a scratchy connection most evenings.  That evening I had a wholesome meal of rice, dal and chapatti in the langar at the Gurudwara. An interesting interlude was that every night a Himalayan black bear with two cubs would come looking for garbage behind the hotels or langar, some people saw them, but I didn’t!

On Day Five I went to the Hemkund Sahib Gurudwara, this is at an altitude of about 4400 meters and I did not feel acclimatised enough to trek up, so I hired a mule (Rs 1150 for the return trip). The trek up can be anything upto 4 – 5 hours, but the mule got me up in about two and a half hours.  I started at 6 am and was up by 8.30 am.  There was a silver lining to to reaching early; I reached before the clouds descended at about 10 am, giving me ample light to get in some spectacular photographs. The mule driver stops at the mid-way point to give the mules a breather and here I grabbed a paratha and lemon tea for breakfast.


The Sarovar at Hemkund  - simply breath-taking

No description or photographs do justice to Hemkund SahibSarovar, it is breath-takingly beautiful. The Gurudwara is a modern structure (Not very appealing, I prefer the old traditional architecture of Gurudwaras though), however when I went in to mathaa teko (pay obeisance) there was a group of Raagi’s  singing followed by the reading of the  paath.  It was a beautifully calm and serene moment which I sat down to absorb.  Next to the Gurudwara is a very old Lakshman Mandir, not as imposing as the Gurudwara, but the panditji had a wonderful charm and it was another very lovely moment. 


The Lakshman mandir


The Gurudwara

The Sarovar (lake) is truly awe-inspiring, very cold, calm and with the mountains around mirrored in the still water it is a sight to behold. The water is so cold that I could not put my hand in for more than a few seconds without excruciating pain, and here I saw the absolute tolerance faith inspires, an elderly Sikh pilgrim was having an unhurried bath in this icy water! 
Emerging from a bath in the icy water

After enjoying the lake, I trekked up the hillside behind the Gurudwara to see the famed and rare Brahma Kamal flower which was in full bloom. 


The famed Brahma Kamal
I had khichdi and tea for lunch at the Gurudwara langar, and then began my mule odyssey down again. A word about riding a mule at these altitudes, the path is narrow and the mule goes so close to the edge that its head is out over the abyss.  This is very scary at first, more so when descending when the mule does a little hop down every step.  It is important to lean forward a bit when going up and lean back with legs straight when descending, this gives the mule balance.  These are very sure footed animals and there is nothing to fear, sit loose and the mule will take care of everything.  I was down by 1.30 pm.

That afternoon I joined a birder group walking down about a kilometer towards the helipad where we saw a mixed hunting party of birds.  My sightings on the trip included Himalayan Vulture, Large-billed Crow, Oriental Turtle Dove,Wedge-tailed Green Pigeon, Coal Tit, Black Bulbul, Grey-bellied Tesia, Variegated Laughingthrush, Whiskered Yuhina, White-cheeked Nuthatch, Bar-tailed Treecreeper, Blue Whistling Thrush, Grey-headed Canary Flycatcher, Grey Wagtail, Pink-browed Rosefinch (very common), White-winged Grosbeak and Bar-throated Siva.


The lush, green Valley
On Day Six I went again to the VoF, after reading many articles and blogs, I had always wanted to go the the end of the Valley. I made a very early morning start at 6 am in pouring rain but when I was on top by 8 am the rain had miraculously cleared, after a brief stop for breakfast at Shepherd’s Rock, I moved on. Being the first up in the Valley I was rewarded by the sight of a family of Pika playing in a rocky nullah. 
The path to the end of the Valley

As I had vowed not take my camera out till I reached the end of the Valley so as to save time, I managed a couple of pictures on my phone.  After walking about four kilometers, the trail tapered off and ended at a river with no visible crossing point.  A quick reconnaissance showed an old path across, so I moved on another 3 km along this path, but I could not see the end, so at 1 pm I reluctantly turned back, exiting the VoF park at 5 pm.


The path from Ghangaria to Govindghat

Day Seven was the day when all good things came to an end, the day of my descent to Govindghat. I had planned to spend the night at Govindghat hence made a late start at 8 am. The same porter I had on the way up came and took my heavier pack as I was trekking with a daypack. It was a pleasant five hour walk down to the taxi stand where I learnt that a landslide had isolated Govindghat from the direction of Joshimath. It was important for me to cross that slide as I had onward reservations from Rishikesh. So, along with a couple of others similarly stranded, I walked another six kilometers to a taxi on the other side of the slide driving as far as Chamoli. The next day it was back to Rishikesh, Delhi and regrettably home.


Memories of Paradise